How to Hike the 4 Day Inca Trail

One of the most famous multi-day hikes in the world, the class 4 day Inca Trail is an iconic adventure that features on many a ‘world’s best hikes’ list. Strap on your boots and get ready to follow in the footsteps of the Incas!
HIKING THE 4 DAY INCA TRAIL
Starting at Kilometre 82 in the Sacred Valley, the classic Inca Trail is a route that stretches 42 kilometres over 4 days and 3 nights to arrive at the Sun Gate, the original entry point to the Lost City of the Incas - Machu Picchu.
But it’s not just the World Heritage and Modern Wonder of the World credentials of Machu Picchu at the end of the hike that make this journey so famous - the Camino Inca is worthy of it’s iconic status in it’s own right.
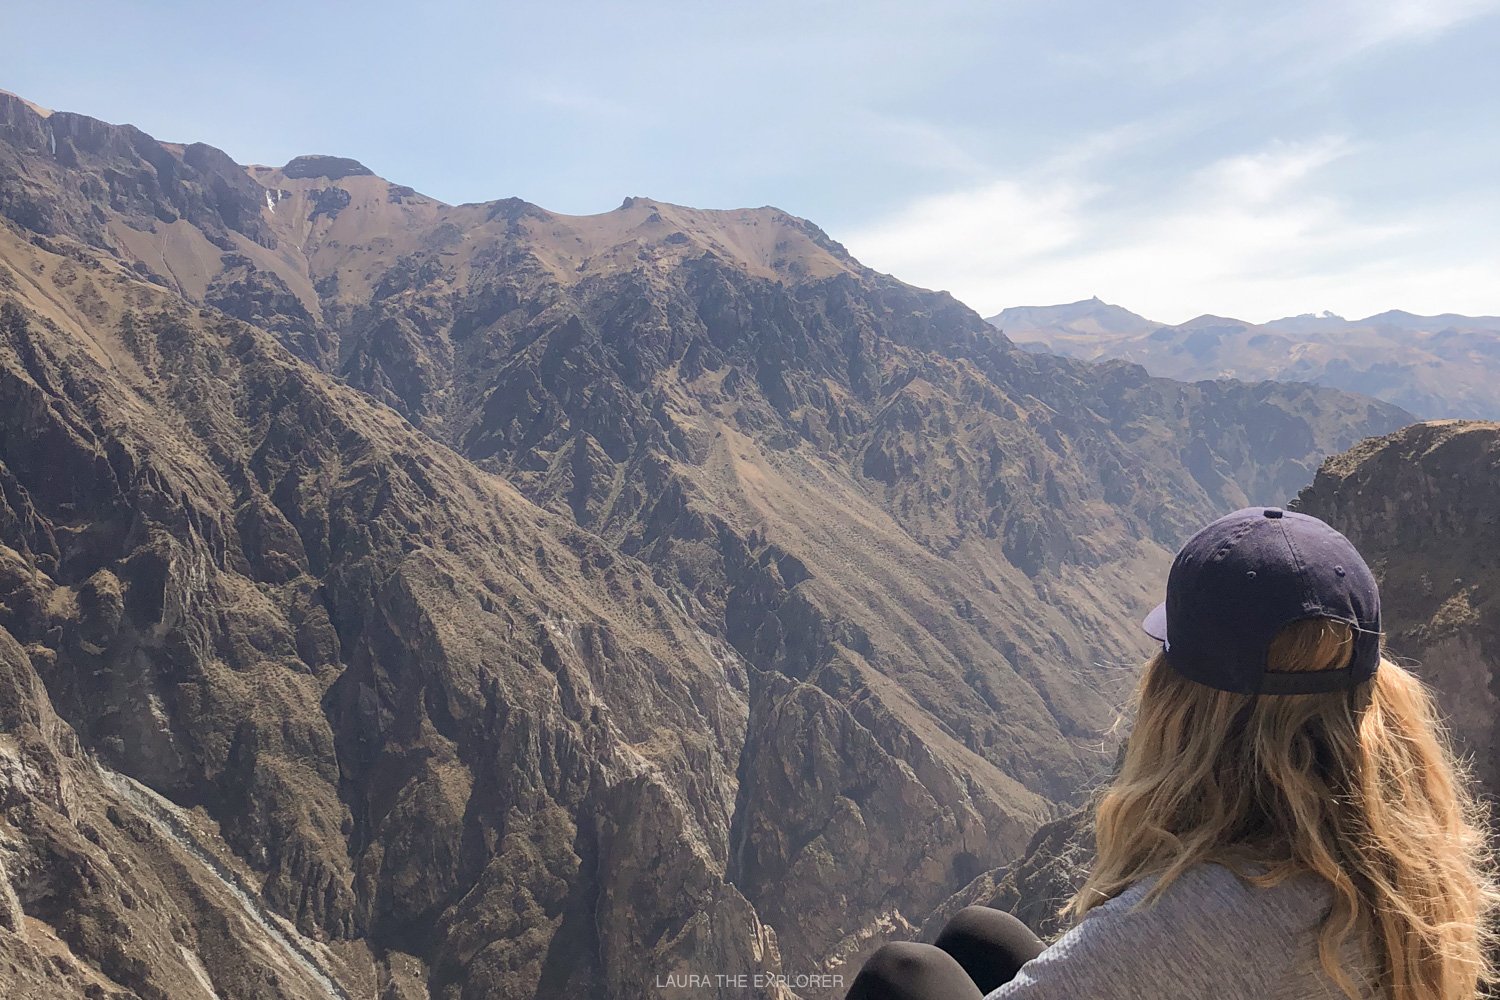
Perhaps it’s that you’re following in the footsteps of the ancient Incans that makes this hike so special. From the Urubamba River valley up into the high cloud forest and alpine tundra of the majestic Andes, the path leads you from one mystical, mountain top Incan ruin to the next. All the while, this trail shows off the incredible local biodiversity of Pachamama (Mother Earth) and embraces you in the warmth of Peruvian hospitality. The Inca Trail is an adventure to remember forever.
If you’re dreaming of a trip to this ultimate bucket list adventure, this comprehensive guide includes everything you need to know before you hike the Inca Trail.
THE BEST TIME OF YEAR TO HIKE THE INCA TRAIL
There are pros and cons to different times of year however the most important thing to know is that Inca Trail is closed for the entire month of February! This month is set aside for maintenance and conservation of the pathways, campsites and ancient ruins along the trail. And it’s also the month with the most rain. So other than February, there’s really no bad time to hike the Inca Trail!
» THE RAINY SUMMER SEASON
The rainy summer season runs from mid-November and into March, with December to February having the highest number of rain days per month. Whilst it doesn’t rain every day, you can definitely expect a decent amount of rain on your trip. That said, if you come prepared with wet weather gear, you’ll get to take advantage of warmer temperatures, far smaller crowds at Machu Picchu, and permits don’t need to be booked so far in advance, it may even be possible to get a last minute permit.
» THE DRY WINTER SEASON
The dry winter season runs from May to mid-August and this is definitely peak season for tourism to Machu Picchu as well as Cusco and Peru in general. These months are dry, but cool, and you can expect sunny days with temperatures dropping off a lot at night. Due to high popularity, hiking permits for the dry season sell out well in advance, quickly after tickets are released in October the year before, so it’s essential to be prepared if you want to hike the trail in one of these months.
» THE SHOULDER SEASONS
The shoulder months of April, September and October can offer great conditions for hiking the trail also. Whilst the chances of rain increase, Machu Picchu is a lot quieter and the temperatures aren’t too hot for hiking during the day and aren’t too cold for camping at night. We hiked the classic trail during October and got a mix of sun and rain - however we felt it really complemented the experience, especially the feeling of floating in the clouds as we made our way through the misty peaks.
It’s also important to remember that up at the high elevations of Machu Picchu and Cusco, weather can really change at any time so it’s best to be prepared with both rain gear and sunscreen at any time of year.
HOW DIFFICULT IS THE INCA TRAIL
» WHAT FITNESS LEVEL IS REQUIRED?
The difficulty of the Inca Trail is a common concern, but based on my experience, if you’re able-bodied to climb stairs with at least a moderate level of fitness, you can definitely complete the 4 day Inca Trail!
Walking 6-8 hours per day may seem pretty daunting, but your guide will manage your pace to suit your ability and ensure a good number of stops along the way. There’s also so many sights to see that time will pass really quickly and you probably won’t even realise how far you’ve actually walked! Another huge help is the fact that you’ll only be carrying a small day pack, so there’s no need to worry about a big heavy pack weighing you down.
» WHAT IS THE INCA TRAIL TERRAIN LIKE?
The trail itself varies a lot in its make up. The first day is predominately wide formed paths that are really easy to navigate - there are a few hills to climb, but it’s nice and smooth underfoot.
From the second day, you’ll encounter a lot more stairs. These stairs can vary a lot in terms of tred (depth of the step) and rise (height between each step) and are formed out of stones and rocks that can be slippery after rain.
» WHAT GEAR HELPS ON THE INCA TRAIL
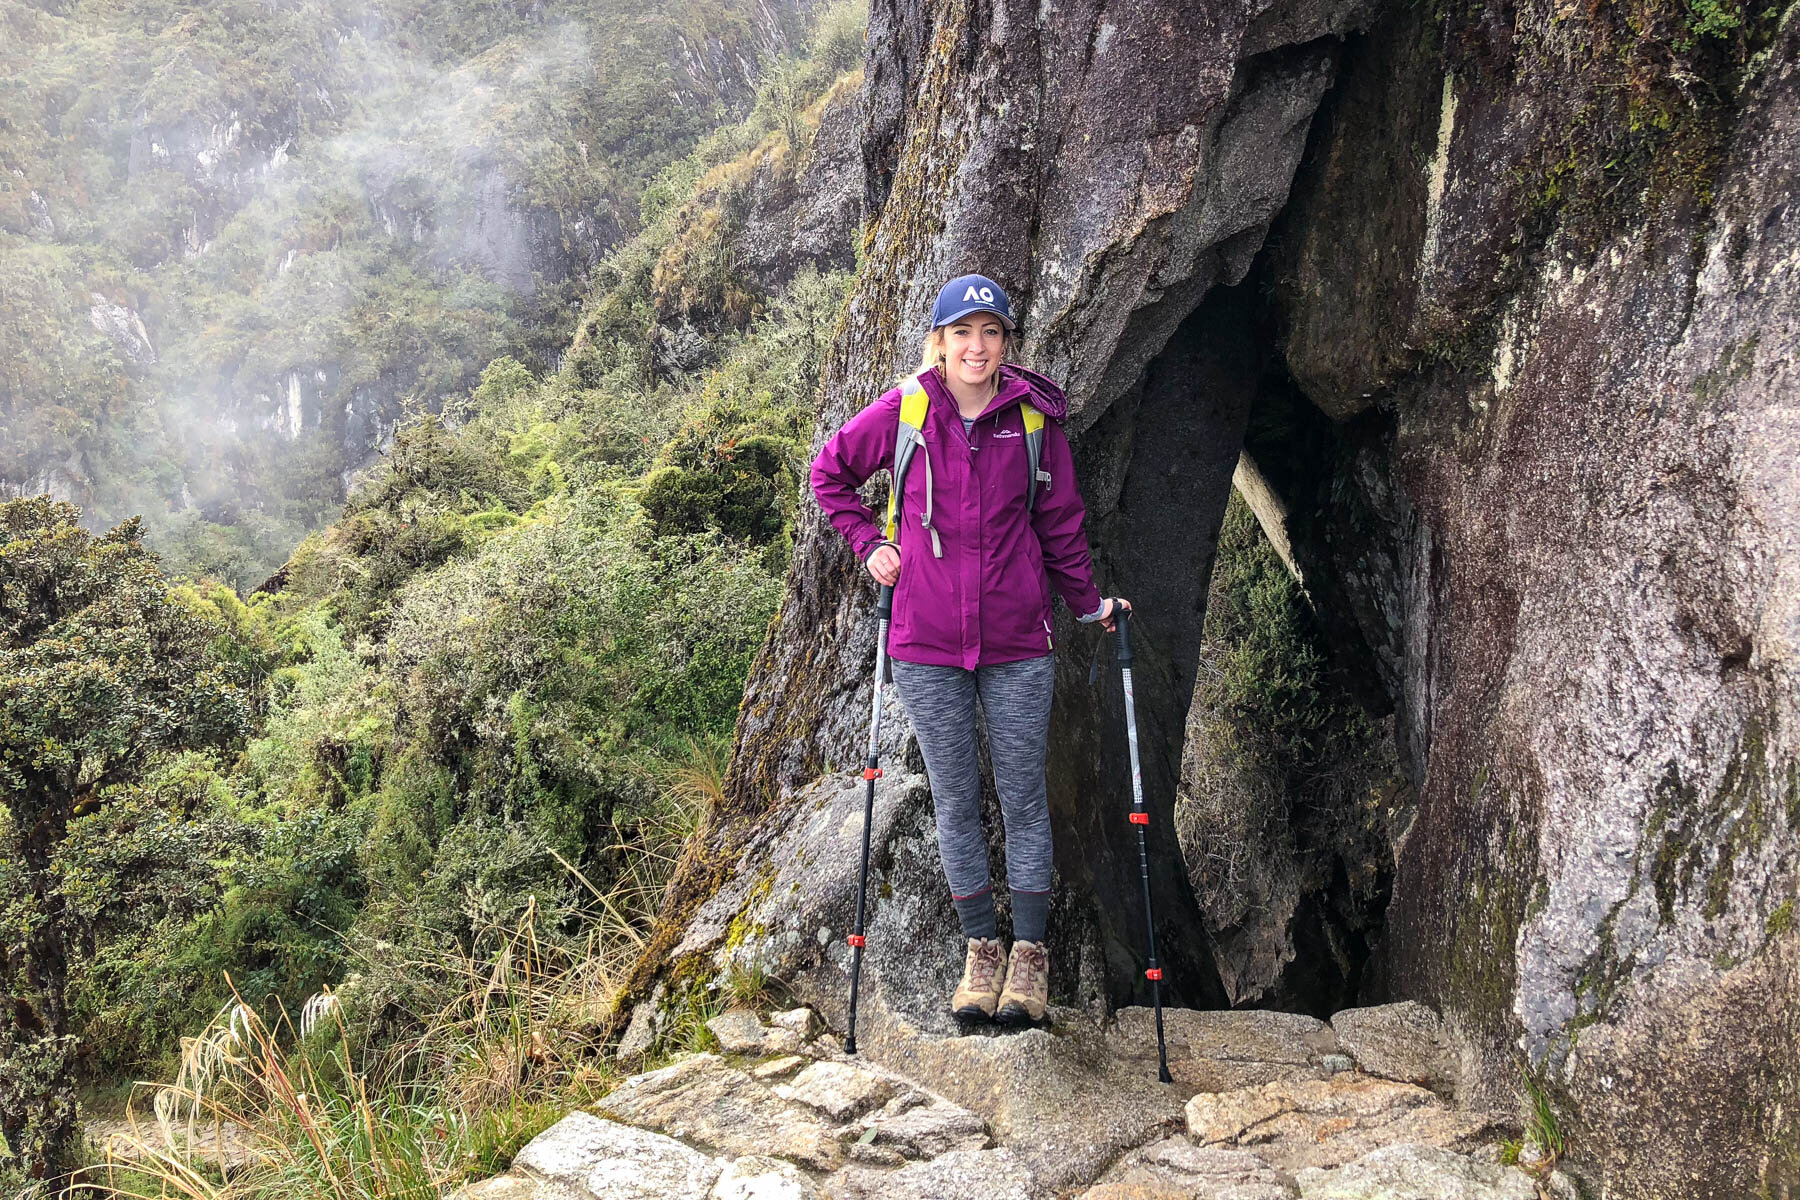
My advice is to rent a pair of hiking poles from your tour company. Even if they’re not something you’d normally carry they can come in super handy! I found them most useful on the wet descent down from Dead Woman’s Pass - the steps were slippery and tall and the hiking poles really helped with stability when navigating these big steps.
A good pair of hiking boots are also necessary. Whilst the porters may fly past in all kinds of footwear, you won’t get away with your average pair of sneakers. Make sure they’re broken in before the hike and you’ll be just fine.
» PREPARE FOR THE ALTITUDE IN PERU
Altitude sickness is another concern that needs to be considered, and the best thing you can do is ensure you acclimatise properly before starting the hike. Spending a few days in Cusco will allow your body to adjust to the thinner air and help avoid any medical complications up the mountain. Whilst you won’t fully know if you will get affected until you’re up at altitude, sufficient acclimatisation is the best way to set yourself up for success. Reputable tour companies will carry oxygen for your safety, but if you’ve experienced altitude sickness before or have an underlying health condition, it’s best to consult a travel medical professional for advice.
Other that if you take it slow and keep your fluid intake up, there’s no reason why you can’t complete the Inca Trail!

IS AN INCA TRAIL PERMIT REQUIRED?
Yes - but that’s a good thing. With the trail limited to 500 people per day (including guides and porters!), it’s important to be organised and book a permit well in advance, especially over peak periods. On the flip side, by limiting numbers the trail is doesn’t get inundated by hikers, and with different guides utilising different campsites along the route it never feels overrun.
For peak periods, you’ll need to book 6-8 months in advance - or as soon as tickets are released in October of each year. For the off-season and shoulder seasons, it’s a lot easier. As an example, when we enquired in March 2018, there was availability every day in October 2018.
Permits can only be acquired through a government-approved guide or tour operator. Typically, the cost of the permit is included in the hiking package but always confirm this. To secure a permit, passport details are required (you’ll also need to show this at the checkpoint at Kilometer 82 the first morning of the hike), and therefore companies cannot pre-order tickets. This helps to eliminate scalping and withholding tickets and ensures all permits are available without individual companies holding a monopoly.
Do be aware that tickets are not transferable, so if your name changes after booking advise your tour company to get this sorted before the hike.
CHOOSING AN INCA TRAIL TOUR GUIDE COMPANY
» CHECK OUT PORTER STANDARDS & LOCAL COMPANIES
As it’s not possible to undertake the trail independently, a government-approved tour operator must be used.
With around 200 companies to chose from, that most important thing you can do is to ensure the company you chose provides and promotes high worker rights for their porters. The real heros of your hike, it’s important to respect, and appropriately compensate, the hard working porters who carry not just your gear, but everything you need for the 4 days including the tents, food, water and even the toilet facilities on their backs.

Whilst you’re sucking in the limited oxygen on your way up to dead woman’s pass, they’ll have already flown past you with their 25kg bundles strapped to their back and are preparing your next delicious meal and cup of hot coca tea.
For more details, on current porters rights, see this article.
Also, by booking a local tour company, the money you spend contributes to the local economy and supports a local business in an area that now relies a lot on tourism.
» CHECK THE GROUP SIZE
All groups are restricted to a maximum of 16 hikers. However in reality, we found that some of the bigger tour operators who run multiple groups per day would keep all their groups together. Even though there was the correct number of guides, porters and amenities per group, it appeared to feel much more crowded at their camps.
There were many benefits to a smaller group, particularly as they are much more agile.
With a smaller group you get much more 1-on-1 time with your guide, more opportunity to engage with your porter team and chef, more tailoring to any requests (photo ops, sights to visit etc), and a huge bonus - quicker getaways each morning. Due to us only being a group of two, we were always one of, if not the first, group hitting the trail each morning. This meant we were one of the first to reach the top of Dead Women’s Pass the second day, and also one of the first to reach the Sun Gate on the last day, and got to see these highlights, along with most of the other Incan ruins, without crowds (and sometimes to ourselves completely!)
» CHECK THE ROUTE STRUCTURE ON OFFER
Take a look at the route structure of the company you’re considering, as the options do vary. One of the best things about choosing a local tour company is that they seemed to pick campsites that result in the ideal hike structure/split up of the days. I’ve described the benefits of the route structure of our tour further on in this post.
» INCA TRAIL TOUR RECOMMENDATIONS
VALENTINS PACHAMAMA JOURNEYS
We were recommended Valentin’s Pachamama Journeys by a friend, and after completing a 2-person guided tour, would highly recommend them to others!
They were professional, organised, easy to communicate with and provided an all round exceptional experience. Established by Valentin, a former porter who worked on the trail himself for years, they have robust connections with local porters and are committed to fair wages and working conditions.
They are also very involved in the local community by supporting social projects in the area and reinvesting profit to long-term social projects.
Our guide, Manuel, was great at keeping us informed with what to expect each day and was extremely knowledgeable on the sights and Incan culture, and he happily answered any questions we threw at him. He also shared with us his experience growing up and living in the Sacred Valley, which added authenticity and an in-depth, personal understanding of local life in Peru.
A guide is also responsible for pacing the hike and Manuel made good judgements to ensure we maximised the sights along the trail and also didn’t wear ourselves out too early.
ALPACA EXPEDITIONS
If you’re looking to keep costs as low as possible by joining a group tour, I’d recommend Alpaca Expeditions. They utilised the same campsites as our tour (more on this below!) and have a strong commitment to fair wages and working conditions for their porters also. They also support equal opportunities and employ many female porters, who are (unfortunately) not yet that common in the porter community.
Both of these companies have excellent review ratings on TripAdvisor.

COST OF THE INCA TRAIL HIKE
The cost to hike the Inca Trail can vary greatly based on provider and what’s included in the tour.
Here are some examples:
Group of 2 (private): US$919pp, Group of 7+ (private): US$683pp
Group of 2 (private): US$1250pp, Group tour of 8-16: US$695pp
From: US$795, groups of 8-16
Whilst more basic, lower costs options are available, please consider the conditions and fair payment of the porters who will make your trip. For not a lot more money, find a provider that values the well-being of their staff.
Tour operators will typically require a deposit of 25%, which enables them to secure your permit for the trail.
» INCLUSIONS IN THE INCA TRAIL TOUR
As part of your tour, the company should provide:
The Inca Trail Permit
Entry ticket to Machu Picchu
Private transport from your accommodation in Cusco to the start of the trek
Train ticket from Aguas Calientes to Ollantaytambo
Private transport from Ollantaytambo to your accomomdation in Cusco.
Supply a duffel bag for your personal belongings, up to 6kg per person, to be carried by a porter (additional luggage can be taken for a fee).
Sleeping tents and mattresses.
Clean, filtered drinking water.
Nutritious meals, prepared by a certified chef (excluding lunch in Aguas Calientes on the final day) and snacks.
Oxygen tank in case of altitude emergencies.
Certified, professional English speaking guide.
Porters to carry all the gear, set up and take down the camp, and assist with cooking.
Our tour company also provided a chemical toilet with a special tent.
» ADDITIONAL COSTS
In addition to the base price of the tour, you can expect to pay nominal costs for additional items such as special air mattresses, hiking poles or additional porters for extra weight you may want to bring.
» CLIMB HUAYNA PICCHU
Whilst visiting Machu Picchu, it’ also possible to climb Huayna Picchu, a mountain peak accessed from one side of Machu Picchu. You’ll need to book this at the same time as your tour as the trail to this peak is limited to 400 people per day. Note that not all tour operators will allow this option, due to the risks associated with this climb (it’s steep and unprotected in places).
» TIPPING ON THE INCA TRAIL
Additionally, prepare in advance to tip your team. Whilst not mandatory, it is common practice to tip and when you consider the wages the porters are making in relation to the difficulty of their work.
It’s easy to put into perspective how meaningful the tips are - we learned from conversations with our team that our porters were all farmers, and completed these tours to pay for their children or grand-children’s education which is not free in Peru.
However, coming from a country where tipping is not normal practice I’ll admit it can be an awkward experience, especially when you may be required to split the tips between porters, chef and guide.
Your tour company may recommend how much to tip, however the general rule of thumb is (from the entire group): 60-80 soles per porter, 80-100 soles to the cook, and 16-200 soles to the guide. This is a suggestion only and should be adjusted based on your views and the standard of your experience.
TRAVEL INSURANCE FOR THE INCA TRAIL
Travel Insurance is a must-have no matter what your travel plan, and hiking at altitude requires a couple of extra considerations.
Read the fine print carefully to find cover that will extend up to 4215M of altitude and provide medical evacuation via helicopter in case of emergencies - there are no roads along the Inca Trail. Many policies only cover up to 1500M and don’t cover medical evacuation by helicopter.
Whilst World Nomads in my usual go to, you’ll need to add on additional cover for the correct altitude as the standard package doesn’t extend of the correct altitude.
Be sure to check the wording carefully and ask for clarifications if you’re unsure.
THE NIGHT BEFORE THE INCA TRAIL HIKE
After a few days acclimatising in Cusco and preparing any last minute things, the evening before the hike you’ll have an orientation session with your tour company and meet your guide. They’ll run through things like timings for collecting you the next day, confirming you have all the necessary gear, double checking your passports match your tickets and providing you with the duffels to pack for the hike. They’ll also take time to answer any questions or concerns you may have and if you’re hiking with a group, you’ll also get to meet your fellow hikers.
Some companies hold these sessions in their offices, but Valentin and our guide Manuel came to meet us at our accommodation. If you’re not arriving in Cusco until late (if this is the case, make sure you are acclimatised!), or staying somewhere else, such as Ollantaytambo, they’ll arrange a time and place to suit your schedule.

WHAT TO PACK FOR THE INCA TRAIL
Thanks to the porters carrying most of your gear, no heavy packs are required on the Inca Trail.
As you’re highly unlikely to be bringing along on the hike all the gear you brought to Peru, prepare to leave the remainder of your gear at your accommodation in Cusco (or wherever you stay before the hike). Most accommodation providers are set up to store gear whilst you’re on the trail, given the popularity of the hike, so this is unlikely to be a problem. Another option is leave gear at the tour company’s offices.
» PACK A DAYPACK
You’ll typically carry a daypack with any valuables and essentials you’ll need each day:
Water (minimum 1L)
Snacks - provided each day by your tour, or bring your own favourites
Camera gear (incl. battery packs)
Jacket/sunglasses/hat/cap - to suit the weather. Your guide will provide advice each day.
Passport, money, other valuables - you’ll need your passport at the trail entry point. Keep everything else on you for security purposes.
Mosquito repellant - get the good stuff. We took a few different kinds and DEET was the only one that was effective. These little bitters will even get through thin clothing, so be prepared!
Sunscreen - due to the altitude, sunscreen is required at all times of the year.
Trekking poles - optional, but highly recommended!
Any other essentials, but keep these to a minimum, it’s best to carry as little as possible.
» PACK THE DUFFEL PROVIDED
The tour company will supply you with a duffel which you can fill to a specified weight limit (this varies by company but is typically 6-7kg). Note: this weight includes your sleeping bag and air mattress if you opted to bring or rent one! Your duffel will be ready and waiting for you in your tent each day.
In your 6kg duffel, pack the following:
Sleeping bag, rated for the right time of year.
Spare hiking clothes for days 2-4 of your hike
Wet weather gear - bring a good rain jacket and waterproof pants, then follow your guides advice for which wet weather gear you should carry in your daypack each day.
Camp clothes - a pair of light runners, comfy clothes and a warm jacket to wear at dinner.
A change of clothes for when you get back down to Aguas Calientes, your duffel will be waiting here and you may want to get out of your hiking gear!
Toilet paper and sanitiser - even though we had our own private toilet with paper supplied, this will be packed up and taken by the porters before you awake on the last morning and you’ll need to use the public toilets after this.
Other toiletries - keep this as limited as you can to meet the weight restriction, but a good stash of bandaids is probably a safe bet.
A head torch (lamp) - for the evenings, and the last morning when you’re up at 2:30am getting ready to hike to the Sun Gate.
Waterproof poncho - this was an absolute life saver. Ensure to add this to soft-plastic recycling when you get home.
Biodegradable wetwipes or travel towel - with no showers available, clean yourself camping style.
You may chose to pack a fresh outfit for your tour of Machu Picchu, however be aware there may be limited opportunities to change once you get down to the citidel from the Sun Gate. You also won’t have access to your duffel until you arrive down in Aguas Calientes after the tour of Machu Picchu, so any gear you switch out of will need to be carried for the duration of your tour.
If packing light is not your forte and you think you’ll struggle to fit the 6kg limit, there is an option to pay an additional cost for an extra duffel. As the porters have a limit on the weight they can carry, an additional porter will be required for extra gear.


FOOD ON THE INCA TRAIL
Based on my experience, you definitely won’t go hungry on the Inca Trail. Expect three course meals, morning wake up calls with coca tea and even a camp stove cake on your last evening. The fact that all of the delicious food and equipment is carried from the start of the trail by the porters and each meal is prepped in camp by your chef is truly incredible.
Meals are well thought out to provide great nutrition for hiking and we had something different every single meal. Along with being super tasty, it was great to try different kinds of Peruvian food. Meals typically consisted of a soup to start, followed by a main and sides, and then something sweet to finish.
Tours should cater to a wide variety of dietary requirements, with vegetarian and allergy-free meals readily available. The only thing you may want to bring is some favourite snacks from home for in between meals, but they’re definitely not necessary as snacks are also provided.
If you do get a craving for a chocolate bar or something similar, on the first day of the hike you’ll pass a few local vendors with items available for purchase and on the second morning after a few hours of walking you’ll find the last vendor of the trail. This stall is run but a little old lady known as ‘the angel of the camino’ - everyday she makes the two hour hike up the Incan stairs to this spot to sell treats, so consider refuelling on a chocolate bar here. We were in awe of her stamina and effort as she flew past us!
CAMPING CONDITIONS ON THE INCA TRAIL
» TENTS
There is no alternative option to camping on the Inca Trail - everybody stays in a tent. Fortunately along with the tents being carried by your incredible porters, they’ll also set them at each day, ready with your duffel for your arrival in camp. Then they’ll pack them up each morning also! It’s a wonderful perk for those used to carrying all their own gear, and a nice introduction to multi-day hiking for those who haven’t done something like this before. Porters really are superstars.
You’ll typically share a tent with your significant other, a friend, or someone from your group of the same sex. Alternatively you can request your own tent for an additional cost.
Your porters will also prepare cooking and dining tents, so meal times are sheltered and comfortable.
» TOILETS ON THE INCA TRAIL
Toilets can often be mentioned as the one negative aspect of the hike.
Our tour company provided a chemical toilet with it’s own tent, exclusively for our use. It was a much appreciated feature, even more so after experiencing the actual trail toilets the last morning waiting for the trail to open.
You’ll smell them before you see them, though you probably don’t want to look too hard either.
They’re typically the squat variety with an extremely overflowing basket of used paper to the side (paper cannot be flushed). The best description is probably to explain that they only get cleaned and emptied once a year, in February, and that should tell you everything you want to know…!
If using these facilities, carry a head torch (head lamp) as you won’t want to be propping your phone up anywhere in the space.


THE CLASSIC INCA TRAIL ROUTE
All hikers start at Kilometre 82 around the same time. Whilst it seemed like there were A LOT of people getting ready to start the trail and we worried that the trail would be overcrowded, that was fortunately not the case.
Throughout the hike your guide will pace the walk to suit your abilities, with ample time to explore the ruins and meeting meal schedules. In larger groups, the guides appeared to manage the varying abilities within their groups - experienced hikers were free to push ahead to reach particular milestones, whilst novice hikers were well supported at a comfortable pace. Remember the Inca Trail is a journey not a destination, so take your time to soak it all in!
As we got the hike underway, the crowd quickly thinned out and thanks to our perfectly located campsites, after lunch on the first day we never saw more than a few other groups until the last night in Winay Wayna.
As mentioned above, Valentin’s team picked the best campsites that resulted in the ideal hiking structure. Whilst it did require a big ‘Day 2’ of the hike, on Day 3, we got to explore the amazing Winay Wayna site, have a social dinner with the team, and an early night in preparation for the 2:30am wakeup call the next day - all while other groups were only just arriving at camp.

THE INCA TRAIL DAY 1
» Distance: 14km (8.7 miles), 6-7 hours.
» Maximum Altitude: 3300M (10825ft)
» Start: Kilometer 82.
Check in with your passport and cross the bridge to the famous ‘Camino Inca’ sign.
» Sights:
The first couple of hours follow the Urubamba River through farms before heading up to Llactapata, the first magnificent Incan ruins to see along the trail. Translating to ‘High City’, Llactapata was a stopping point for Incans making the journey to Machu Picchu and was rediscovered by Hiram Bingham in 1912.
» Difficulty:
The first day of the trail would be described as moderate. It’s predominately flat until a small climb to reach the ruins of Llactapata. After exploring the site, it’s about two hours of uphill to lunch, and from there, another two hours uphill. Overall, the 600M elevation gain is very manageable and is a good way to get your legs accustomed to the journey.
» Lunch: Hatuncancha.
Many of the other groups stop here for the night, but after a relaxing lunch stop, we continued on to our quiet campsite.
» Campsite: Ayapata.
It’s a beautiful spot to watch the sunset over the mountains. You should arrive in the later afternoon and have a chance to rest before dinner at about 7pm.


THE INCA TRAIL DAY 2
» Distance: 16km (9.94 miles), 8-9 hours.
» Maximum Altitude: 4215M - the top of Dead Woman’s Pass and the high point of the hike!
» Sights:
After a morning’s hard work, you’ll be rewarded with one of the highlights of the trail - Dead Woman’s Pass at 4215M. Time for some photos, a high-five and a moment to catch your breath! After lunch and a few more stairs, you’ll reach the top of the second highest point, Runkuraqay, at 4000M.
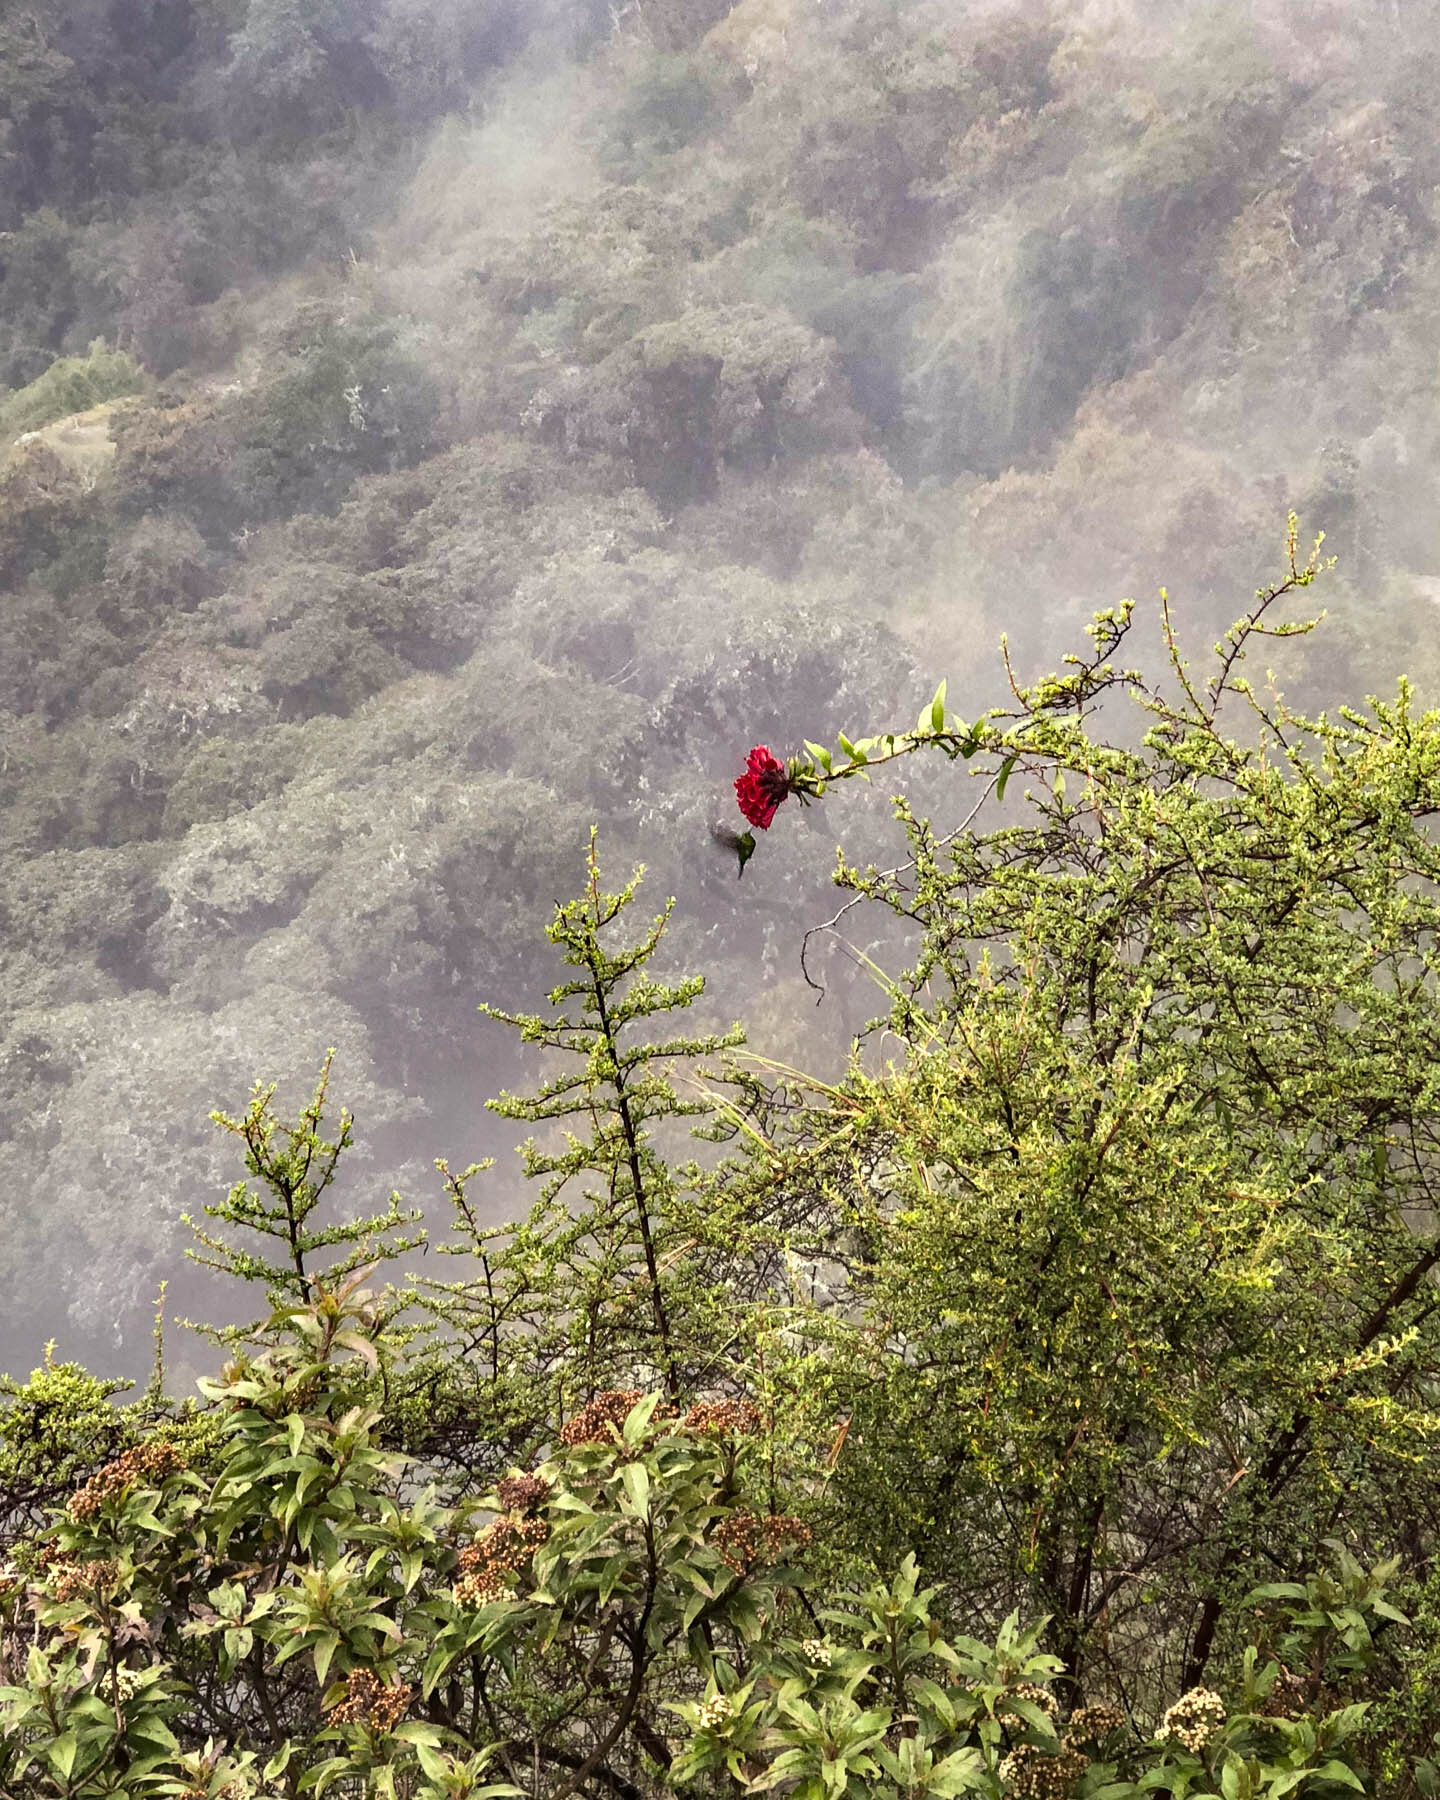
Not much further along is the second Incan ruins of the hike, which we had all to ourselves. Sayacmarca (Quechuan for Dominant Town) is an impressive complex featuring a Temple of the Sun and an intelligent canal system. Also keep an eye out for hummingbirds playing around the trail!
» Difficulty:
There’s no denying that this is the hardest day of the hike, but by good acclimatisation, pacing yourself and some determination, it’s totally achievable. Be prepared for a lot stairs, both on the way up and on the way down. I personally find the descent more difficult thanks to weak ankles - but hiking poles are your best friend! They make the large, stone stairs much easier to navigate. For some of the big staircases, it also helped to step down facing sideways rather than straight down the hill.
The second ascent also makes this day more challenging, but you’ve done it once so you can do it again! Refueled and rested from a good lunch break, the 500M ascent up to Runkuraqay will be the last big climb of the hike - it’s pretty much all downhill from here!
» Lunch: Pacaymayu
After descending down the from top of the pass, it’s time for a relaxing lunch stop before pushing on. Again, many of the other tours stop here for the night.
» Campsite: Chaquicocha
Regarding as having the most scenic views of all campsites, we’d have to agree. Resting your feet whilst taking in the views of the beautiful Vilcabamba mountains is the perfect way to end a big day. You might even find a llama to two chilling next to your tent.

THE INCA TRAIL DAY 3:
» Distance: 10km (6.2 miles), 5-6 hours.
» Maximum Altitude: 3600M
» Sights:
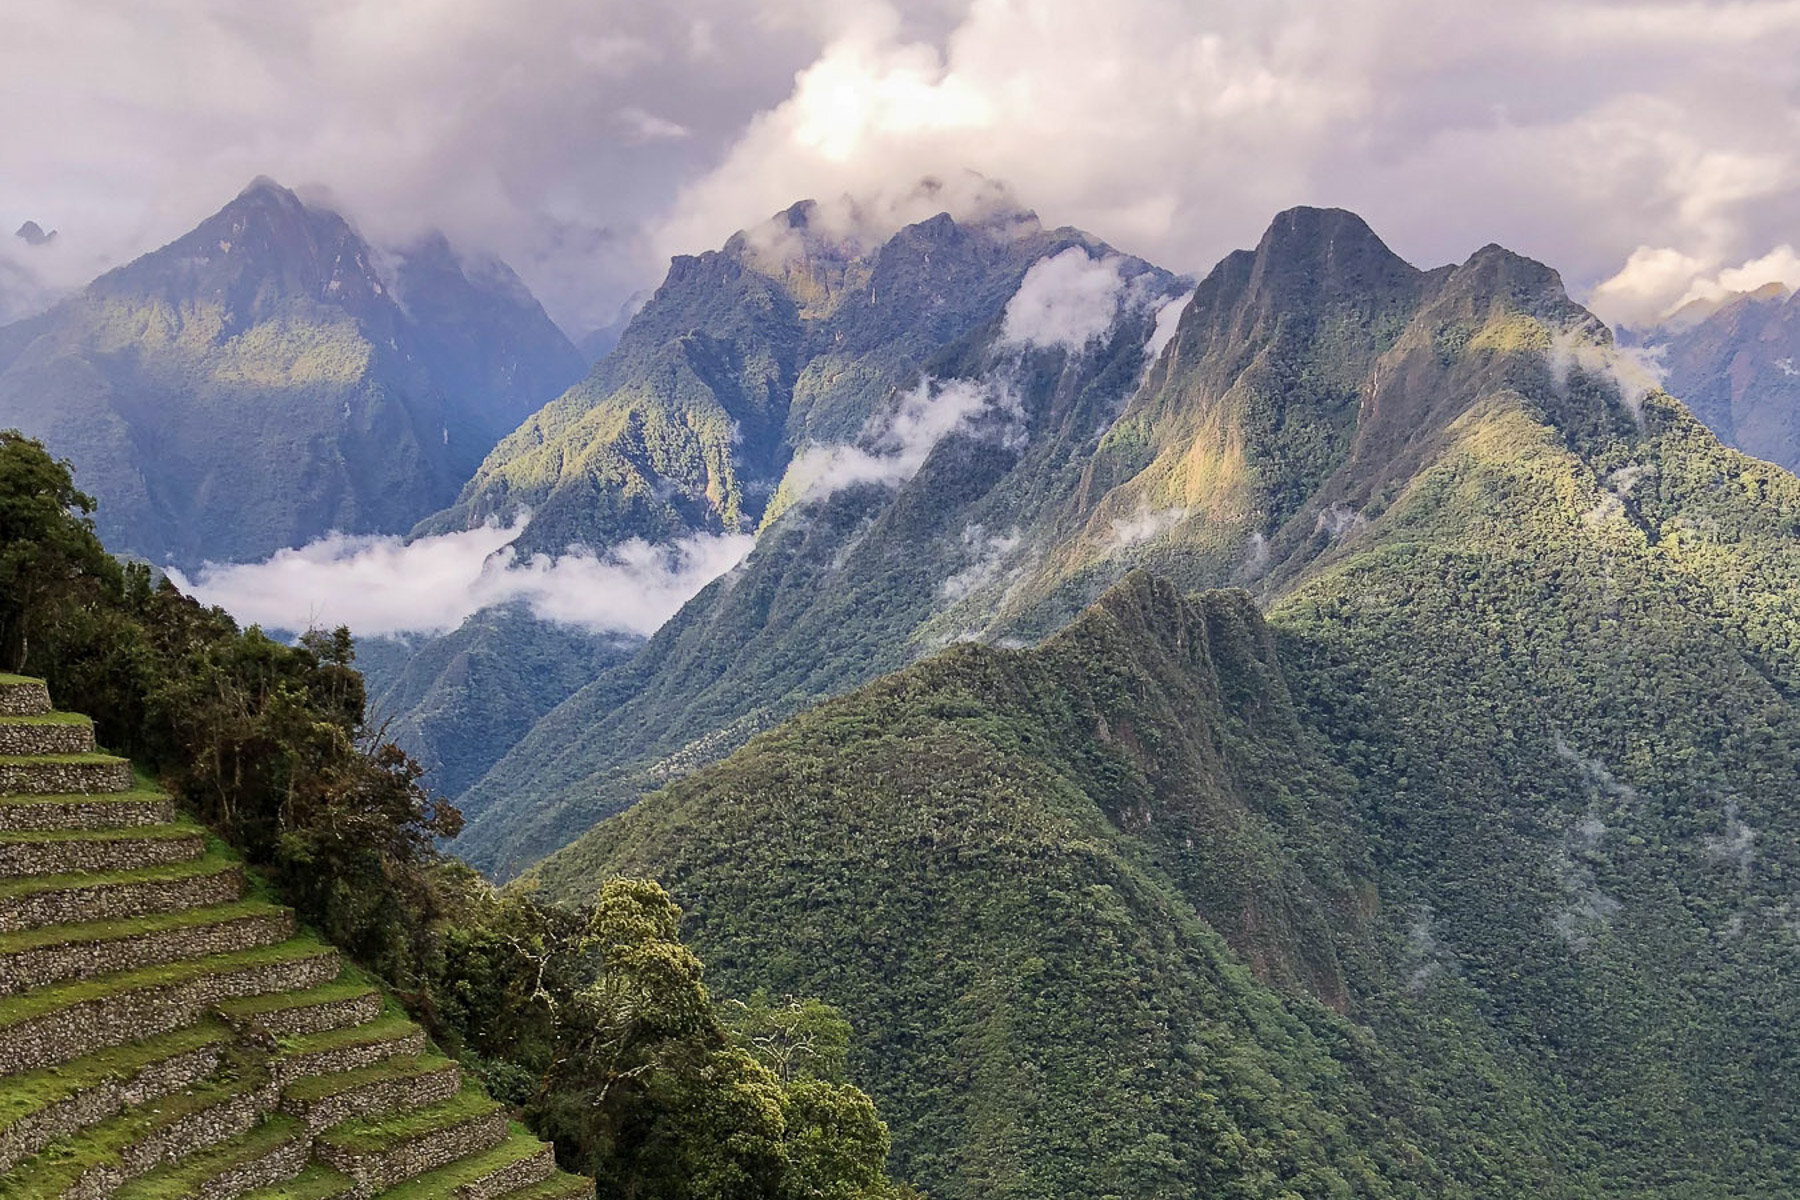
One of the major features of today is the original Incan stairs that pave the way. These lead to the first Incan ruins of the day, Phuyupatamarca, which translates to The Place Above the Clouds. This complex is still largely intact and has amazing views out over the valley.
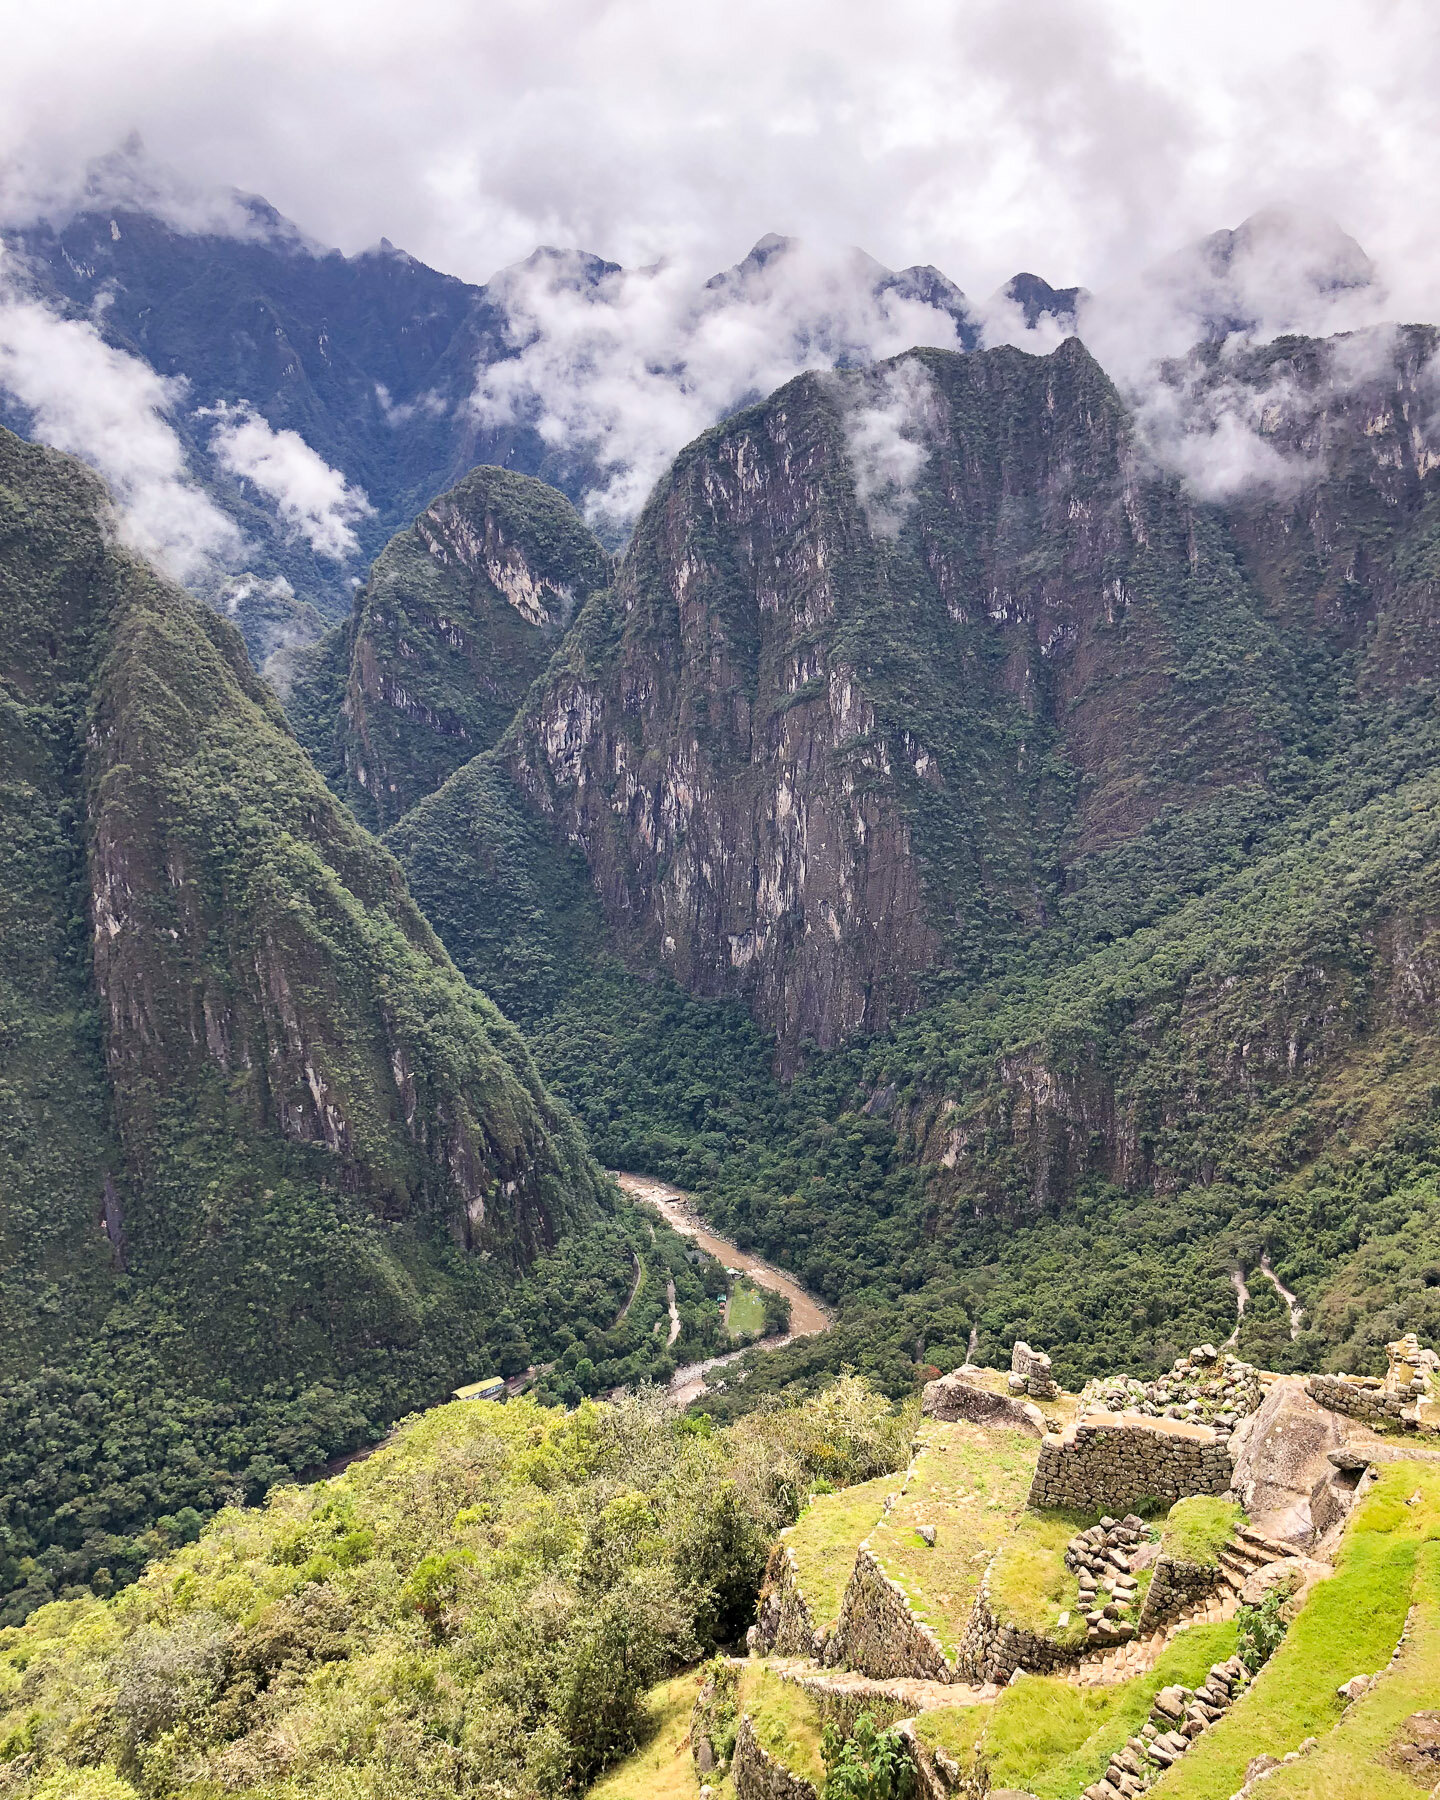
The second Incan ruins of the day are the impressive terraces at Intipata - The Place of the Sun - an important location for cultivation of crops, and the views down the Urubamba river are incredible!
Wiñay Wayna (Forever young) is the final ruins of the day, located a 10 minute walk from camp. These spectacular terraces and structures offer sweeping views of the Urubamba Valley and also feature a waterfall nearby.
We were lucky enough to have all three of these ancient Incan ruins to ourselves which made for an incredible experience.
» Difficulty:
This is probably the cruisiest day of all, as it’s all downhill. There are still a lot of Incan stairs to contend with however, so it’s not a simple walk in the park. However after the uphill efforts of the previous days, it’s a treat to have it a little easier.
» Lunch: Wiñay Wayna
After the morning hike, you’ll arrive at Wiñay Wayna, which will also be your camp for the night.
» Campsite: Wiñay Wayna
The final campsite is also the busiest as all the tours stay here on the last night, however it’s really close to the stunning Wiñay Wayna ruins and the entry point for the final stretch to Macchu Picchu the next day.

THE INCA TRAIL DAY 4:
» Distance: 6km (3.7 miles), 2 hours - to reach Machu Picchu.
» Maximum Altitude: 2700M
» Sights:
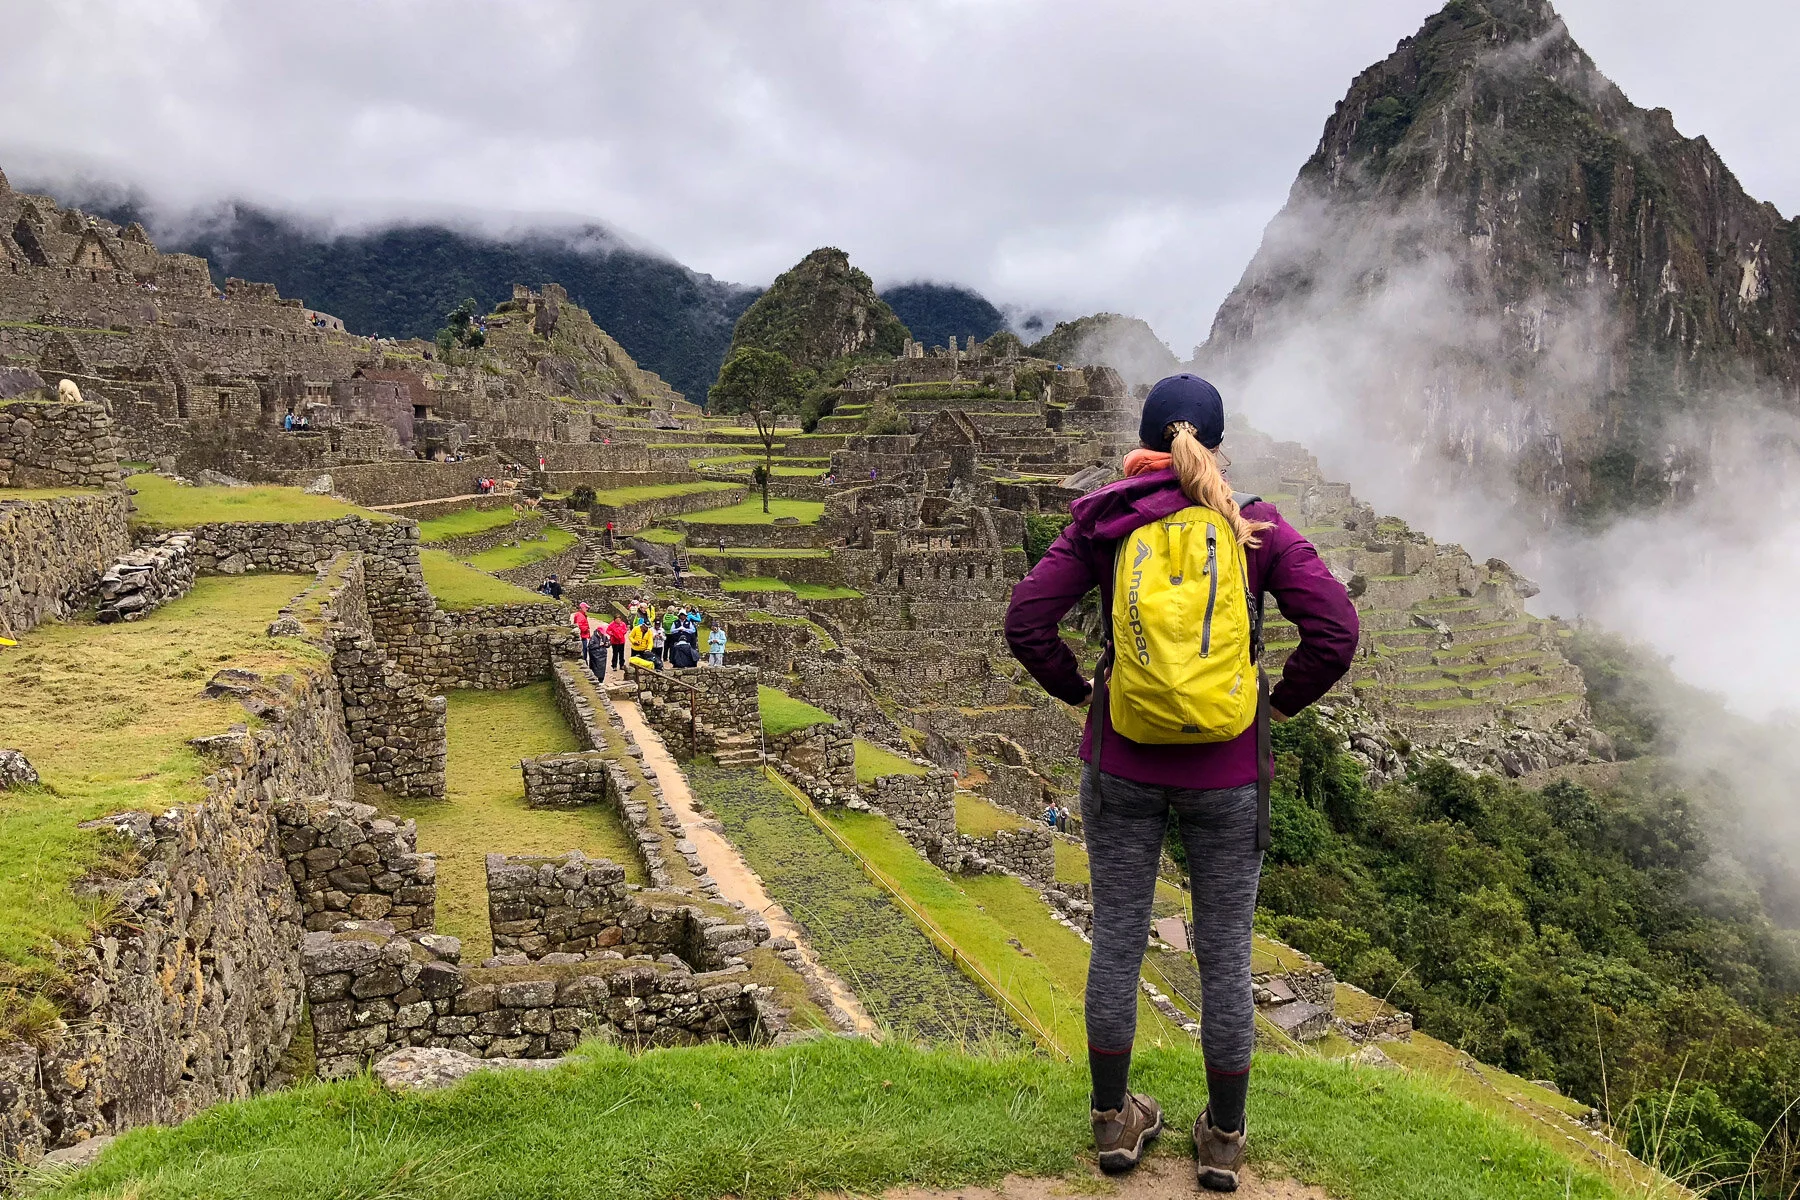
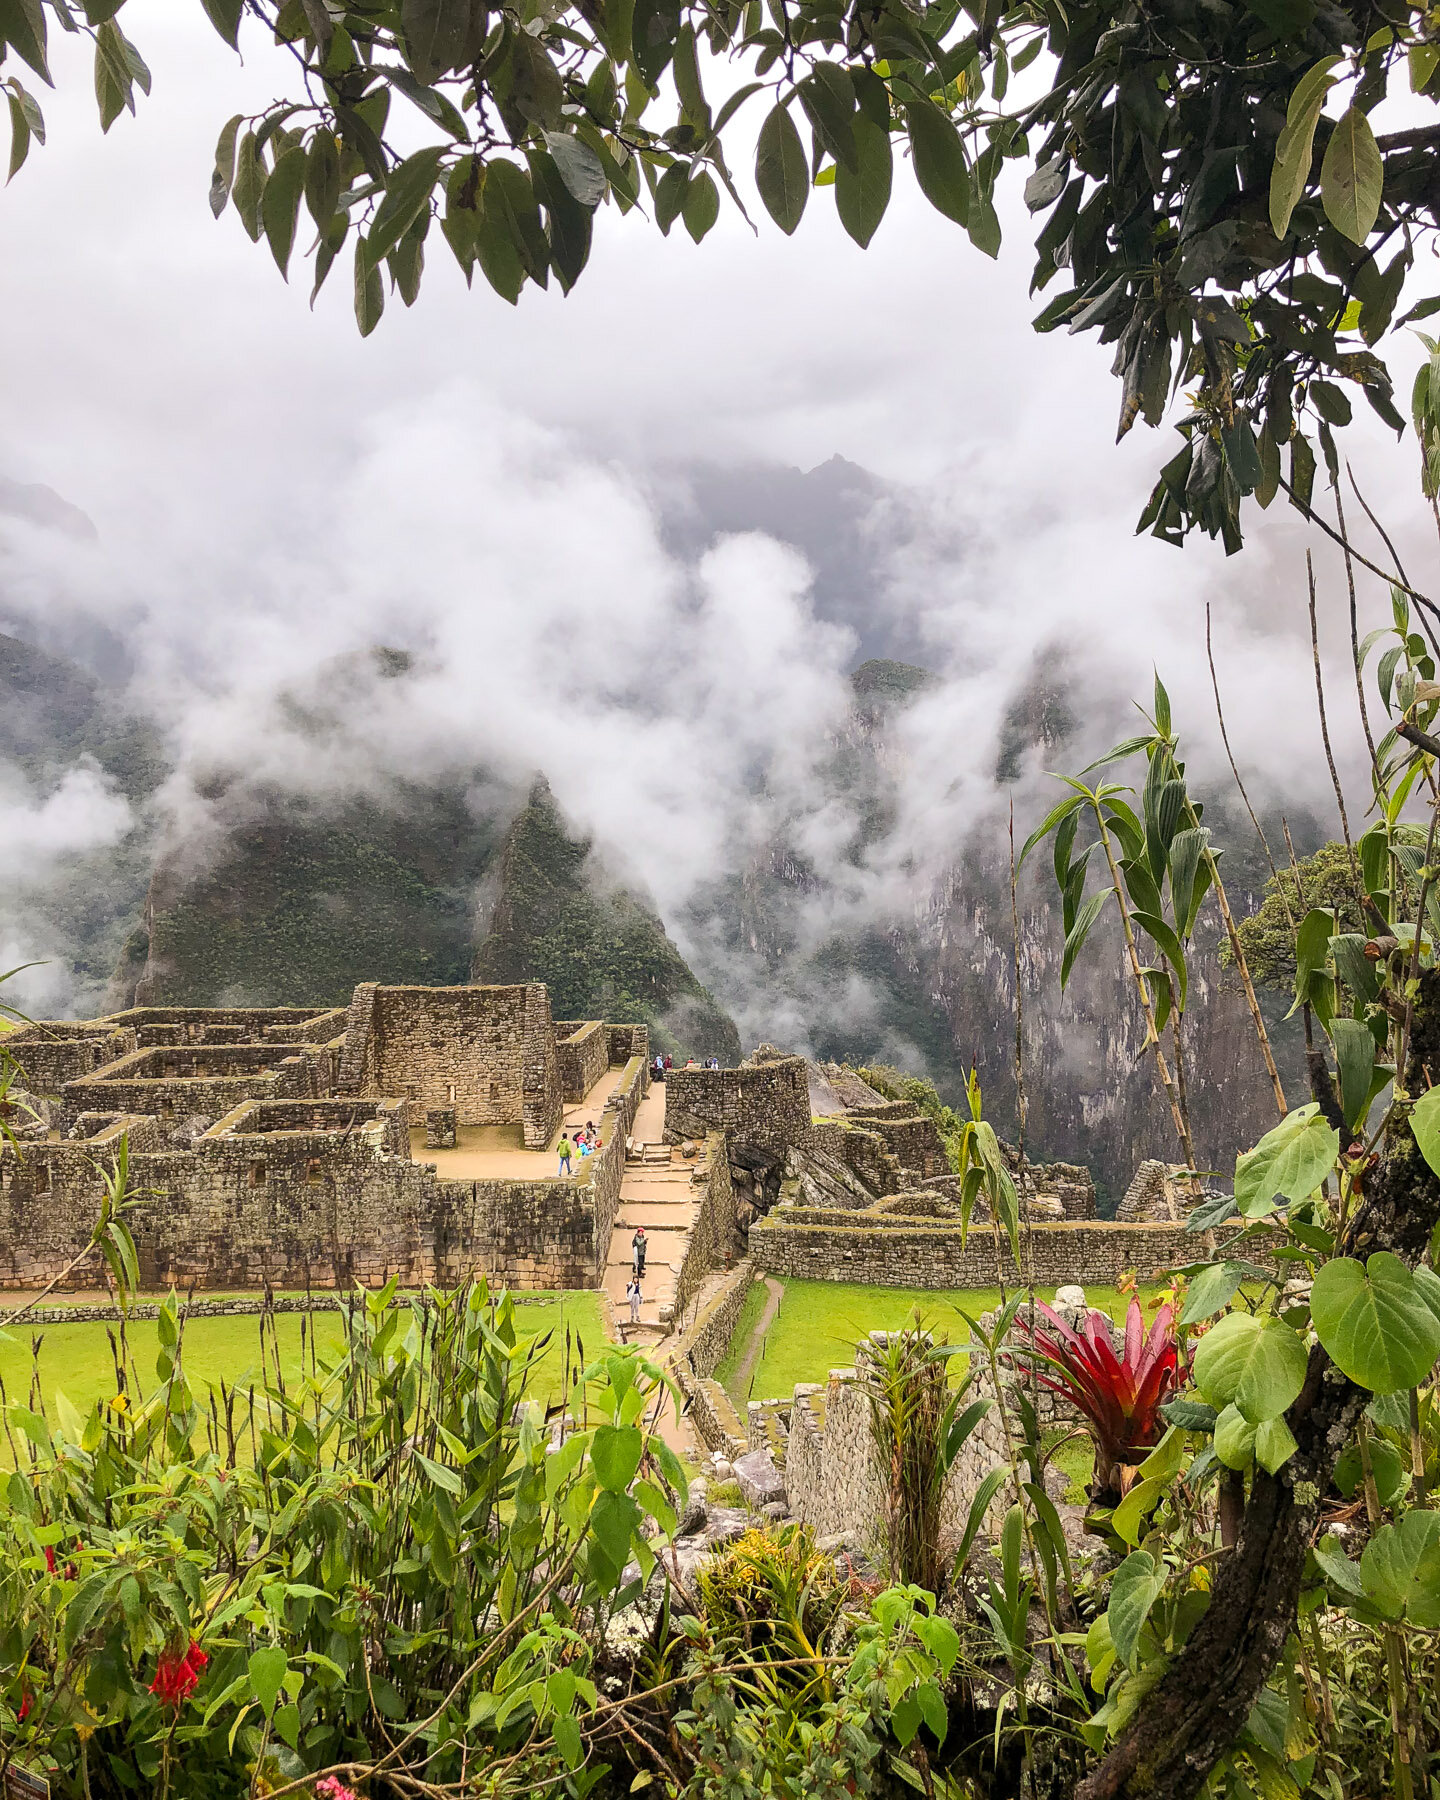
The last day of the hike is all about the most famous Incan ruins, and probably the reason you decided to tackle this hike in the first place - Machu Picchu. Arriving at the Sun Gate, you’ll be rewarded with magical views over the quiet ancient city.
» Difficulty:
Reaching Intipunku (the Sun Gate) as the sunrises over Machu Picchu will provide an incredible sense of achievement and provide the final motivations needed for the final stretch down to the citadel.
An early start is required though - we were up about 3:00am, to get organised to queue in the dark until the gates open at 5:30am. You’ll need to be up in time for the porters to pack up and make their way down to the porter train first thing in the morning. The added benefit of getting in the queue early is nabbing a spot in the shelter, if you don’t join the queue early, you might be waiting with no cover - and a potential long wait in the rain.
But as soon as the gates open, it’s time go go! Apparently it’s popular for enthusiastic hikers to train-run this section, however that didn’t seem to be the case on our trip - perhaps because pachamama decided to really put the ‘rain’ in rainforest that morning and everyone was pretty soggy.
The trail itself generally descends down for this final section of the Inca Trail, until one final uphill climb to reach Intipunku - the original gate to Machu Picchu.

» OTHER INCA TRAIL ROUTE OPTIONS
If the classic four day / three night option seems too rushed, there’s also an option to complete the trail in five days / four nights. This is a great option for families with kids, or if you’re concerned about the physicality required for the trail. It follows the same route but breaks up the hiking into more manageable sections.

INCA TRAIL TOUR COMPLETION
» MACCHU PICCHU TOUR
After the final descent down into the citadel, you guide will provide a detailed tour of the incredible Incan ruins of Machu Picchu, and provide plenty of opportunities to soak in this modern wonder of the world. Our tour never felt rushed and we descended by bus down to Aguas Calientes when we were ready. We had pre-puchased entry to Huayna Picchu, however due to the wet weather and just being a bit exhausted from the last few days, we decided against the additional climb, but there’s plenty of time to complete this if you’ve got a ticket.
On arrival in Aguas Calientes, you’ll be taken to a restaurant where your bags will also be waiting. We were pretty thankful to change in to a set of fresh, clean clothes! You’re also free to pick anywhere to eat, the restaurant choice is not compulsory. Also note that this meal is generally not included in the tour.
» RETURN TO CUSCO AFTER THE INCA TRAIL
After lunch, you may have some time to explore the small town of Aguas Calientes or take a quick trip to the hot springs to soak sore muscles before alighting the tourist train back to Ollantaytambo. From here, a private shuttle will provide the trip back to your accommodation in Cusco (or elsewhere).
For more suggestions on places to continue your trip in Peru, see: Peru & Bolivia: What to Expect + 3 Week Itinerary


FINAL TIPS FOR THE INCA TRAIL
Take your time - stop and enjoy the Incan sights that only trail walkers get to experience.
Expect to start very early each morning, and to fall into bed straight after dinner each night.
Get acclimatised - most issues in completing the trail arise from not being properly acclimatised.
Bring good bug repellent - these Peruvian mosquitos do not joke around.
Be prepared for all weather conditions - unexpected rain, hot sunny afternoons, and cold evenings.
Want to save this guide for later? Pin it!


The blog post was about: